Information

Information

Magnetic Stud Finder vs. Electronic ModelsStud finders add a hands-on tool for construction renovation, repair and decoration as you can peer beneath walls for objects without having to tear up a whole structure. The battle for the possession of the niche plays off a magnetic stud finder vs. electronic models.

Magnetic stud detectors integrate a magnet that pivots or dangles on a small area enveloped in plastic or glass. As you scan, the magnet moves to indicate a metallic nail and screw underneath.

Electronic stud finders boast advanced features for sensing density fluctuations beneath the wall. They can detect the center or edge of a stud while advanced models incorporate metal and AC live wiring scan mode to ferret out electrical cables, metallic screws or nail heads.

8 Things To Consider about Magnetic Stud Finder vs. Electronic Versions:

1. How Magnetic Stud Detectors Do the Job

Stationary Magnetic Stud Finders

  • Some magnetic stud sensors integrate a small stationary magnet to pinpoint the nails and screws driven into studs while erecting the walling material
  • You must move the unit around the wall until sensing the forces of magnetism and go in the course of attraction

Moving Magnetic Sensors

  • Moving magnetic stud sensors use a magnet suspended in a compartment and free to run in line with hidden metal
  • On walls with superficial fasteners, the magnet moves in the direction of the wall with such speed that it creates a distinct thud sound when it homes onto the wall
  • Since it does not depend on the user’s instinct to sense the pull to the metal, you can unravel fasters ensconced in deeply beneath plaster and tile

2. Electronic Stud Finders

Edge-finding stud detectors detect the ends of the stud or other material beneath the walling. It indicates a variation in density, probably the stud’s edge. Move from both sides to pinpoint both edges. After marking the edges, you can home in the center of the stud.

Center stud finders sense the midpoint of a stud with dual sensors that sample separate data of the wall’s dielectric constant. If the two sets of data match, the unit shows the center of the stud.

Instant stud finders embody a recent innovation with multiple detection plates that work motionless to detect a target. They utilize an algorithm to sample the readings feeding into different sensor plates for a faster, more precise indication.

3. Targets Detected by Magnetic & Electronic Stud Finders

Magnetic detectors narrow down regions for nails and screws fixed into studs. Stationary magnetic indicators cannot indicate the presence of fasteners deep or shrouded under thicker walling layers.

Moving magnetic sensors can pinpoint fasteners nestled more deeply beneath plaster and tile. For deep-scanning fasteners, they generate a softer sound due to the snail’s gallop.

Electronic stud finders analyze dielectric constant fluctuations. They also detect metal, joists, live AC voltage and. They discover stud edges or centers and multiple sites of a wall in one fell swoop like the midpoint of a stud, edges of the target, and section without studs.

4. Magnetic Stud Detectors

PROs

  • Battery-free stud detectors driven by rare-earth magnets allow you to pin down studs through a subtle, yet indirect method
  • Help in narrowing down screws and nails in the wooden studs
  • Minimalist and less electromechanical parts make them cheaper while its less prone to downtimes and malfunctioning
  • Compact due to lack of motors and mechanical assembly, more comfortable to slip in your pocket, toolbox or pouch, and super-lightweight
  • Easy to use without batteries
  • Ideal for stud sensing roughly half an inch deep

CONs

  • Cumbersome on the walls of houses erected with the modern conventional standards
  • Magnetic stud finders project false positives and often require more work to ascertain the stud’s precise location

5. Electronic Stud Finders

PROs

  • Inbuilt electrometrical parts utilize sensors to pinpoint the exact location of studs
  • Probing walls for dialectic changes or density fluctuations render more accurate readings than magnetic versions with audiovisual cues
  • Multi-scanner models examine standard walls, concrete, and cement for metal components like rebar and pipes as well as live AC wires
  • Electronic gadgets screen up to 3”thick for a more vivid probe

CONs

  • Top-of-the-line and expensive quality
  • Battery-reliant and prone to downtimes
  • Sophisticated and require mastery
  • They don’t always snugly occupy small spaces
  • Detect pre-determined targets like edges, center, and regions hosting them with pinpoint precision

6. Electronic Stud Finders Outclass Their Magnetic Counterparts

Electronic sensors probe the depth of a wall for fluctuations in density, detect the edges of studs, project relevant readings on digital displays, and possess extra scanning modes.

Revolutionary products pinpoint multiple studs simultaneously due to their sizable sensors to generate different scanning regions that can work separately. They also pierce the walling veil of metal, joists, pipes, rebar and live electrical wiring.

By making several probes, the device’s sensors recalibrate to help you hone in on the accurate size of the stud by verifying where edges reach.

LED blinks, sound beeps, and bars indicating the scanning mode or low battery allow easy understanding with hands-on data.

7. Features of Top-Quality Magnetic Stud Detectors

  • To enlarge the scope of the magnet, Neodymium-equipped magnetic stud finders with the capability to freely move within the case means it’s capable of pinpointing studs through almost all surfaces
  • Integrated probing pin helps pinpoint the edges of a stud in the wall and attaching to your wall plate allows hands-free leveling
  • Ergonomic structures allow a comfortable grip o scan surfaces
  • Notched base with marking space makes it more convenient to highlight points
  • No need for audiovisual alerts as magnetism properties indicates the existence of metal studs in that region. The device hits the breaks and halts when it detects a stud.

8. Features of Top-Class Electronic Sensors

  • Electronic sensors pack all bells and whistles, including digital displays and app operability, multi-modal settings
  • Large sensors have an extended reach to probe more space quickly and identify multiple studs simultaneously
  • Center-targeting capability lets you work out the midpoint of the stud via scanning with no manual or guesswork input
  • LED lights that illuminate a visual system when you hit the mark render convenience and ergonomic superiority
  • Audio or visual clues will fire off if you hone in on the exact location
  • Additional scanning modes allow you to screen metal items beneath like pipes, gas ducts, rebar and live electrical wiring

Final Verdict

In the magnetic stud finder vs. electronic model arms race, battery-powered and electromechanical inventions cannot completely knock spots off magnetism. Magnetic stud sensors cost only a small fortune while they will detect studs in lath and plaster.

The pricier electronic multi-scanning units have extra modes, auto-capabilities, and additional illumination to help highlight regions with clockwork accuracy.

Advanced stud detectors can probe a wall or other sturdy surface for metal targets like the pipe, live electrical wiring and rebar. Electronic detectors armed with multiple sensor plates forage the wall in various locations instantly. You can access the center of a stud, edge, width, and absence of studs in a single stroke.

Information

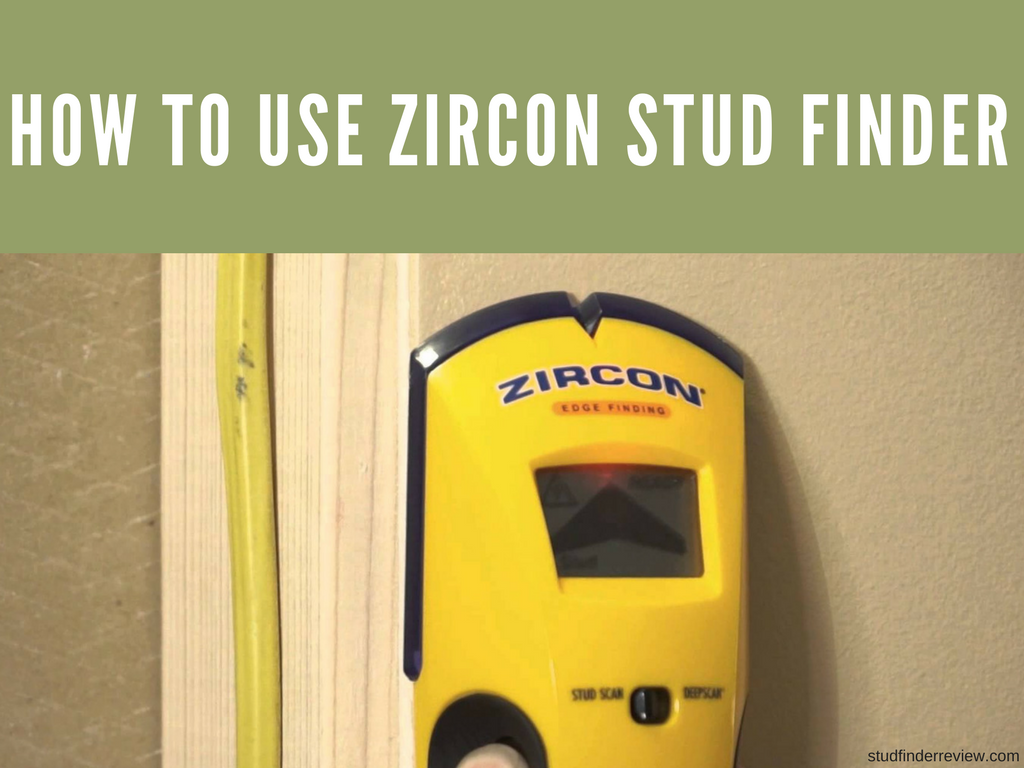
How To Use Zircon Stud FinderTop-class detectors can hit the jackpot before you hammer that nail by sampling density fluctuations in a wall. Capacitive finders firing on all cylinders detect anomalies in wall density at a thicker width and depth.
 

Top-of-the-line models developed by the Zircon Corporation of Campbell, Calif., come with a mode that improves the sensitivity to slightly more than an inch. With smash hits hot off the press for the company, our how to use zircon stud finder guide relates to the StudSensor™ SL and StudSensor™ Pro SL lineup.

Zircon stud sensors nail down the edges of metal or timber studs up to ¾” deep in walling. The models hone in the edges of joists or studs 1 ½”deep in floors, ceilings, and walls.

8 Things To Consider on How To Use Zircon Stud Finder:

1. Tips and Tricks to Swing into Action

Do not press your other hand or another part of your body on the wall under probe

Based on the proximity of live AC wiring or pipes to a walling, the scanner senses them just like studs. You can scour walls, floors, and ceilings before driving nails, cutting and drilling in walls

To avoid red herrings, remember that joists and studs have a spacing of 16” or 24” with a 1 ½” in width. Anything proximate or of different width will not be a stud, joist, and firebreak.

Always switch off the electrical outlets when nailing, knocking through or cutting near electricity cables

2. How To Replace Batteries in Zircon Stud Sensor

Do not unscrew the rear of the device as you will loosen the components under the hood and cause damage.

Open the battery door in the rear. Insert a fresh and handpicked Zircon battery; match the positive and negative terminals to the bars inscribed on the rear.

Snap the battery snugly and replace the compartment door. You can also install the battery belt clip. Use one hand to push the lip of the compartment cover up to 1/16”.

After lifting the tab, the cover flings open. Slide the battery lid off.

Slip in a fresh and functioning 9V alkaline battery into space, terminal side headfirst. Match the negative and positive terminals. Glide the lid back on like removing and snap-fit snugly into place.

3. How To Use Edge Finder Zircon Tools

Hold the stud finder flat onto the wall and keep the detecting surface flush with the walling continuously to avoid false readings.

Turn on the device by pushing the switch to the side. It will illuminate temporarily and calibrate to the wall’s density.

At snail’s gallop, slide the Zircon either left or right, if you get an “over-the-stud” warning, retrace your pathway.

Cover more area, and the device will allow you to see precisely the location of a stud’s edge. Mark the spot if the array of LEDs report where you locate a stud’s edge. Repeat the process from the other side to highlight the other edge with pinpoint precision. The equidistant between the marks indicate the center.

4. Probing Different Surfaces

Sensing depth and accuracy of the Zircon varies due to water vapor, type of materials, wall texture, and paint.

  • Freshly-painted walls: They require a week or so to dry after painting.
  • Wallpaper: StudSensor™ SL and StudSensor™ Pro SL models go like clockwork on walls lined with wallpaper and fabric unless they have metal foil, fibers or still drenched after application
  • Lath & Plaster: Due to indentations in plaster width, the tool may give false positives and negatives. The models do not scan for wood studs or joists shrouded by ceramic tile, carpeting, and pad. But it will hit the spot when examining drywall, floors, and ceilings.

5. Locating A Stud

Always probe for studs with the detector placed flat on the wall. Hold the device flat against the wall, then push and hold the Power button.

A beep will verify the end of calibration before moving the scanner. Continue to press the POWER button then slowly glide it horizontally along the surface, right or left.

As you draw near a stud, the red LEDs will illuminate, from bottom to top.

With the top green LED illuminated, the SpotLite beam illumines, you have homed onto the edge of a stud. Mark the spot.

Do not release the button as you continue screening beyond the highlighted place until the green LED fades. Slide backward to identify the other edge. The middle of the marks hones in the midpoint.

6. DEEPSCAN® MODE

The Deep Scan Mode will help you overcome obstacles like thicker walling seams or depth of targets. Thicker or denser walls will cause the scanner to give false positives and negatives.

  1. You can scan for studs ensconced deep in walling with a more penetrative DEEPSCAN® MODE.
  2. With the tool still positioned flat on the wall and triggered on, release and re-press the POWER button in a trice.
  3. The DEEPSCAN® MODE LED will shine. Re-scan for studs again with the most intense LED highlighted as the edge of the target. The most intense LED emitted as you scan shows the stud’s edge.

7. Troubleshooting Hints & Tips

  • If the tool indicates nothing, it infers no studs in that location or DEEPSCAN® MODE, and you have inadvertently calibrated above a stud. Move a few inches left or right to re-probe.
  • If you calibrate over a stud or a denser portion of the wall, switch it off moving over a couple of inches, push the POWER button and restart.
  • Top green LED does not illuminate as you scan, but only a few red LEDs shine
  • Tweak to DEEPSCAN® MODE to zero in studs underneath the thick and dense concrete
  • Zircons can detect other items besides studs, including electrical wiring and metal or plastic pipes adjacent to the back surface of a wall

8. Why You Must Re-Calibrate the Zircon Stud Sensors

Due to the numerous varieties of techniques used to erect flanks, calibrating the unit helps keep sensors firing on all cylinders as you transit across different surfaces or materials. Walls constitute a diverse mixture of wood, drywall width, paint coatings and much more.

  • Calibrating the detector on a stud-less partition gives the tool a capability to determine the wall thickness or material density and sample factors like humidity, heat and even the slightest electric data
  • Hypersensitivity ensures scalpel-precision readings, but fluctuations in the wall, ambient moisture, a buildup of static electric fields or repositioning the palm of your hand can distort data

Final Verdict

If your toolbox packs this brand, you have to learn the ropes on how to use zircon stud finder by poring over your manual. You can home in onto metal and wood studs, joists and AC to pave the way for renovations or minor improvements.

Zircon tools now incorporate multi-scanning modes like the metal detection to uncover studs beneath lath and plaster walls. Most Zircon stud sensors and multi-scanner detectors give an up-and-running operation with a fresh 9V battery.

If you encounter false positives or negatives, calibrate and experiment the tool on a surface. Always keep the stud sensor fastened with the screws and high-impact cover on for extra protection.

Information

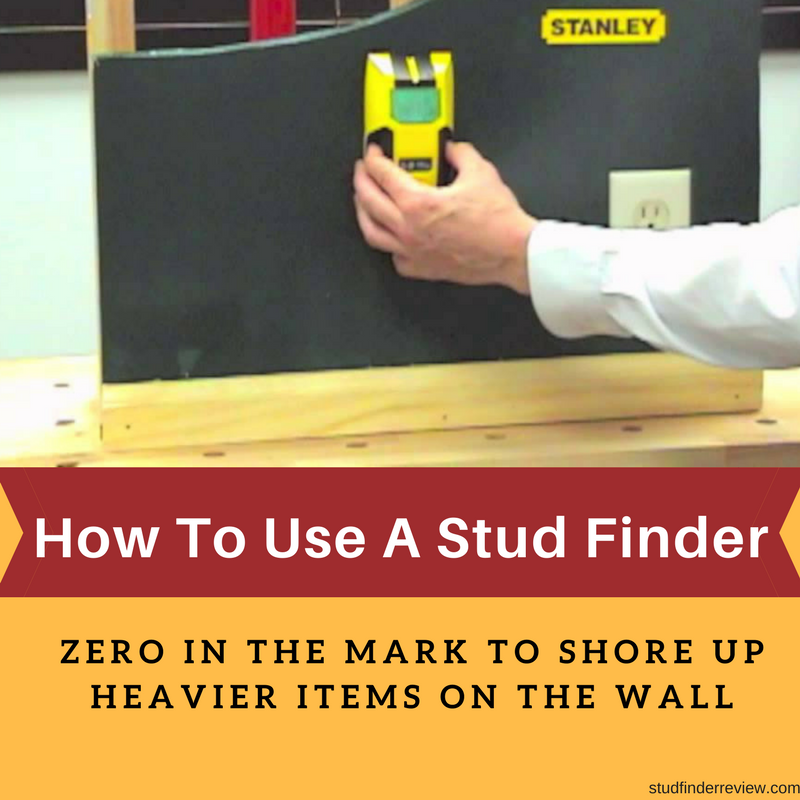
How To Use A Stud FinderFor contractors and do-it-yourselfers, existing studs help prop up new installation such as shelves, mount pictures or heavy objects on your wall sturdily. To hit the nail on the head, adhere to the manufacturer instructions, marking edges and centers of any stud reading using a pencil.

But stud finders also home in onto pipes, wiring or conduit making it an ace in the hole for home renovation, hanging items or punching through the wall.

The device will go through the wall with a fine-tooth comb supported by audiovisual alerts and repeated probing to range in studs with pinpoint-accuracy. To fathom inaccurate readings; you may want to use a nail to thread through and confirm the presence of studs underneath.

8 Things To Consider | How To Use A Stud Finder:

1. Initial Considerations

Check batteries, use only fresh and functioning ones as dead ones distort readings significantly.

Keep the wall all-spruced up, clear out any obstruction as they interfere with readings.

Cross-check the flat side of the device where you’ll access contacts and shield the wall against scratches.

Studs typically lie 16’’ to 24’’ apart; you will narrow down in the region within a dual-foot span.

Tool up the stud finder with a tape measure and pencil.

As you screen across the length of a wall, a pattern of readings emerge with studs scattered 16’’ apart. Readings with a different width and irregular location indicate you should not drive screws and nails.

2. Probing Walls with a Stud Finder

Hold the stud finder entirely against the wall with the top and base staying in contact with the surface. Place it roughly 1 foot left of the site of drilling or mounting.

Switch it on and calibrate in line with the manual until beeping stops.

Slowly slide the device from left to right, horizontally with the body flat on the lining.

When the tool produces audio or visual alerts, retrace a few inches in close range and double-check the site of beep or flashing light.

As you dislocate the stud finder, it will beep on the edge of the stud. Mark all sides to determine the dead center of the stud.

3. Edge-and-Center Finding

Stud finders produce signals when it detects the edge of open space beneath the wall and the end of a dense object.

Mark the point with a pencil or painter’s tape.

Recalibrate the stud finder or move it proximately from the opposite direction.

Locate and highlight the opposite edge. It lies approximately 1-1/2’’ from the first marking.

Measure and identify the midpoint which sandwiches the edges-the center of the stud.

Center-sensing models hit the mark-the center directly.

Studs also detect the existence of Live or unsheathed electrical wires.

Pinpoint various points on the target stud and range in adjacent studs to ascertain the presence of targets.

4. SAFETY INSTRUCTIONS

Remove the batteries when storing the tool for long to prevent damage when they deteriorate.

Ascertain the stud finder works on the type of wall you want to scan as most will only work on dry interior ones.

Do not nail, drill and cut into the wall with electrical wiring and shrouded water pipes as it’s dangerous. In case of electrical wiring buried beneath the wall, switch the circuit off before punching through the structure.

It’s possible for a stud finder to sense wiring and water pipes, but most models will detect wooden studs on drywall with a maximum depth in inches.

5. Precision-Operation for Proper Handling

  • While probing, keep the device in contact with the surface.
  • If the tool lifts off, you need to recalibrate or await automatic function.
  • If the beep or LED alert fails to illuminate or indicate calibration, you may have done it over a moist surface. Switch it off and restart the calibration by moving it 5-inch or 8-inch leftwards.
  • When the unit alerts you nonstop as you calibrate, you may have calibrated above a metal pipe. Move it left or right a couple of inches and reactivate calibration.
  • When grasping the unit, your hand should remain at the same point during calibration and screening.

6. Troubleshooting Electronic Stud Finders

  1. If the device fails to turn on, check the batteries’ status and installation onto the connector. Some models have a battery-low auto indicator.
  2. Read the manual for operating instructions and adhere to all steps as any deviation will cause errors in sensing.
  3. Electronic stud finders reading the sampling of wall density requires proper calibration for pinpoint-precision detection.
  4. Stud finders have unique technology and techniques; thus they differ on scanning depths.
  5. Building materials like lath and plaster seams can diminish the precision of a stud finder. Tiles made from natural stones like marble and granite can distort readings in the device.

7. Directions & Clues Given By Stud Finders

  1. Though stud finders integrate unique scanning technologies, audiovisual alerts help verify that a stud lies beyond a certain point on the wall.
  2. Use the relevant data outlined on a visual display or interface for navigation aid.
  3. Studs’ or joists’ spacing measures between 16” to 24” apart with an edge breadth of 1-1/2’’, anything located closer together or at varying width does not constitute a stud, joist, and firebreak.
  4. Tool up with a pencil or use the notched curvature of the detector’s base to mark the position of the studs, so you do not miss the point on a sprawling area.
  5. For the most accurate readings, use the stud finder at the wall’s top and bottom for correspondence.

8. Why Use Stud Finders Rather Than Old-Age Tricks?

  • Helps you identify the framing studs in the wall without poring over drafting plans
  • Orients home renovation or decoration to mount paintings, portrait, mirrors and built-in shelves securely
  • Some stud finders can sense metal, live AC voltage, and pipes with features such as edge-finding, center-locating or instant detectors.
  • The devices may also integrate a spotlight projecting mechanism that will emit an arrow-shaped beam on the wall to help you mark it.
  • Top-of-the-line versions with deep-scanning technology can probe all types of materials like sheetrock, plaster, drywall, carpets, ceilings, lath or tile.
  • Others pinpoint the width of clandestine metal items

Final Verdict

Now that you have mastered how to use a stud finder, you can peg down targets without missing the mark. Handle the precision instrument with extra care, avoiding shock, extreme heat, and vibrations. Check batteries regularly to deter deterioration and keep the unit dry and shipshape.

A vast proportion of digital multi-scanner stud detectors offer multiple functions, settings, and superior sensing systems to home in wood studs, metal or live wiring.

You should also stick to the manual script; never second-guess your manufacturer and tool up with essential accessories like a pencil, lever, and tape measure. For connoisseur DIYers, you can wing it with a magnet or experiment one of the old tricks to locate targets.

Information

Priced way down below preposterously expensive models, magnetic stud finders can help you mark the bull’s eye and hit the spot.

How To Use A Magnetic Stud Finder

Tooling up your hardware kit with a magnetic stud finder equips you with a hands-on tool to steer clear of potential bodily injuries and property damage. The market offers stationary and moving magnetic stud finders to locate screws in drywall to depict precisely the exact point of targets.

Advanced magnetic stud finders integrate a probing pin to help narrow down the edge of a stud within the wall. Some also have an inbuilt level, notched base and ergonomic design for convenient use. Exposing stronger support studs allows you to mount heavy electronics like TVs sturdily.

8 Things To Consider About How To Use A Magnetic Stud Finder:

1. Magnetic Stud Finders & How they Work

Magnetic stud detectors set the stage for the explosion of other technologies and may not go out of the market soon. They can detect metal in the concrete as the magnet leaps towards it with the tentacles growing stronger as you move it closer to the target.

  • Electronic stud finders will hit a snag when hunting for hidden studs and joists beneath plasterboard walling
  • Neodymium-equipped magnetic stud finders probe a surface and locate the nails and screws as it’s pulled toward the metal
  • The units can hold their weights letting you drill or screw into the layers either directly on top or beneath the magnet in the acoustic clue as you hit the timber joist each time

2. Stationary Magnetic Stud Finders

Stationary magnetic stud sensors run on a small immovable magnet to detect the screws and nails fixed into studs to support the walling structure.

Move the magnet around the surface until you sense the tentacles of electromagnetism as it will pull you toward the target location.

The overall attraction decreases where the metal fasteners lie more deeply in the substructure.

For studs superficially located underneath drywall will come to light with a stationary magnetic stud detector.

Stationary magnetic stud detectors cannot punch through thicker wall materials like lath and plaster. It’s difficult to feel the magnetic forces making other techniques like tapping gently as the key and final tests.

3. Moving Magnetic Stud Sensors

Moving magnetic stud finders utilize a neodymium magnet that’s suspended in a compartment and free to oscillate in response to shrouded metal. The intensity of this exotic earth magnet and its seamless movement allow units to probe a broad array of construction materials. The attraction remains in a position where it remains in a “home” point until it’s moved directly above a metal stud.

  1. When scanning walls with superficial studs, the magnet leaps towards the wall with the pace that makes a unique thunk sound when it latches onto the wall.
  2. Given that a moving magnet ditches the need for the user to sense the attraction, you can uncover studs buried more deeply beneath plaster and tile.
  3. For deeply-located studs, a softer pitch follows the slowed movement of the magnet.

4. Marking & Using A Probing Pin

  1. Once the unit hits on a screw or nail, imprint a removable mark on the wall directly below.
  2. You can ascertain the presence of a stud by sliding the magnetic stud sensor up and down to locate a second and third screw beneath the wall.
  3. Read the manual to expose or adjust the probing pin at-the-ready.
  4. Begin approximately ½” away from the first pencil indicator and dip the probing pin every ½” until it slips entirely into the wall. Once you complete it, you’ve nailed down one edge of the stud.
  5. Repeat this process to zero in the other stud edges and the midpoint of the stud.

5. Different Scanning Materials

Magnetic stud finders outclass electronic navigators as they shine through thicker and denser plaster or lath walls as it’s not prone to red herring density changes.

You can home in the studs by detecting nails and screws shoring up the walls.

Works on drywall, sheetrock, plaster, tile, lathe, floors, ceilings and other materials where electronic stud finders fear to tread.

You can find metal studs with a stronger magnetic stud detector regardless of the materials used to erect walls or finish lining such as plasterboards.

Magnetic stud sensors will do the job on freshly painted walls, ceramic and traditional construction designs. You can narrow down metallic studs regardless of moisture, density fluctuations and other sources of false leads.

6. Shortcomings in Using Magnetic Stud Sensors

Will not detect other targets like live AC wire and non-metallic objects.

Lack data sampling and digital displays as well as audiovisual alerts ubiquitous in their electronic rivals.

Do not navigate wall surfaces for edges, the center of the stud, and multiple targets in a single stroke like high-end electronic gadgets.

Cannot detect other types of embedded materials such as unsheathed live AC wiring making any venture risky due to electrocution. If you suspect the presence of electrical components, switch off the outlet before cut into the wall.

No automatic functions, multi-scanning modes, and 3D mapping or viewing. You may require other tools for mounting, remodeling, face-lifting or decorations.

7. Benefits of Using Magnetic Stud Sensors

  • Super-strong neodymium magnets offer a perfect fusion of durability, functionality, and cost-efficiency
  • Dual neodymium magnets allow you to probe a sprawling area than other models
  • Some have a notched base, multi-position level or V-bottomed design that makes marking a breeze
  • They require no batteries, recalibration, or subtle positioning to detect targets
  • Can home in studs where electronic gadgets fail to hit the broad side of a barn like a lath and plaster walls
  • No affected by density changes in walls making them ideal for denser lath and plaster structures
  • Easy-picking for budget-conscious do-it-yourselfers as they cost a few bucks while you can wing it with a strong refrigerator magnet

8. Detective Cues & Tips for Magnetic Stud Finders

  • Some magnetic stud finders cannot detect targets if the drywall layer exceeds 5/8″
  • Standard wood stud size: common 2 x 4” (51 x 102 mm) minimum 1½’’ x 3½’’ (38 x 89 mm)
  • You can measure in 16” or 24” increments after finding a stud to locate the next target
  • Some houses have different stud spacing rather than 16-inch or 24-inch.
  • Use a needle or bent hanger to verify the center of a stud with exactitude
  • Find the edges of a stud to pin down the center and mark points with a pencil

Final Verdict

Our how to use a magnetic stud finder guide makes the venture as easy as A, B, C while manufacturers offer wallet-friendly tools. At only a small fortune, you can start narrowing down studs while having a whale of a time as you use your physics to flirt with magnetic tentacles.

As electronic units wrestle with density, magnetic tools hit the high spots by identifying screws or nails in drywall to depict exactly where studs sit.

Besides, top-of-the-line versions boast a probing pin for easier edge-finding, level to attach to the surface for hands-free leveling and subtle base for accurate marking. With thicker plaster and lath, electronic models become all vine and no tater, while magnet stud sensors hit the nail on the head.

Information

Unlike drywall’s fluid density, plaster walls manifest fluctuations on the backside of the surface. Stud finders designed to sense a change in density in the wall will not do the job on lath and plaster.

How to Find Studs in Plaster Wall

Laths have horizontal fastening on vertical studs, with wire mesh added and two seams of plaster applied over the strips. The lath and plaster construction makes it challenging to pinpoint the studs to mount heavy objects like shelves and electronics.

A multi-scanner and metal detecting stud finder that pegs down nails that fix the lath to a stud instead of detecting density will hit the “sweet” spot. A simple wire scan or other techniques can help you pinpoint the studs or joists in plaster walls or ceilings.

8 Things To Consider about How to Find Studs in Plaster Wall:

1. Metal Scanners Go Like Clockwork

Top-class multi-scanner stud detectors with a metal scanning mode will not fall prey to red herrings due to changes in density along the backside of the wall. A metal sensor or dedicated metal scan mode helps you pinpoint tiny nails and tacks that fasten all pieces of wood lath to studs.

  • Slide the device horizontally along the wall while it’s activated or toggled on. The scanner will produce light or sound beep to help you highlight on the surface the exact spot.
  • Decreases the sensitivity on the scanner negligibly, start at one nail and probe straight up the wall. If it reports metal at a pattern, it hits a chain of nails indicating a stud.

2. Architrave or Attic Scouring for Studs

To ascertain joist and stud region, mount on the attic and give rafters a walk-through but not in-between to measure up the first joist’s location.

Also estimate the distance spacing joists from the midpoint of each joist.

Transfer the surveying to the room’s wall, measuring from the same column where you estimated in the attic. Begin at the corner and highlight the wall along the room in 16” or 24” intervals as indicated in the attic.

Common balloon framed houses install ceiling joists and studs 16” or 24” on midpoint. Joists usually hinge directly onto studs above the wall’s top plate.

3. Live AC Electrical Wire Probing

Wire scanning provides the oldest of zeroing in studs beneath plaster walls and joists in ceilings.

To forage, cut and even out a coat hanger using wire cutters. Measure exactly 3 ½” from one edge to bend the piece at a 90 degrees angle or L shape.

Examine the baseboard and crown molding minutely for noticeable nails as a clue leading to studs or ceiling joists. You can tap the wall gently for a thud but not a hollow sound.

Dip the crooked end of the hanger into the crevice, poking it through beyond the 90 degrees bend. Spin it clockwise, if the hanger runs into a solid structure, you have found a stud.

4. Trace the Electrical Units

  • Electrical units for outlets or light switches nailed directly to studs offer more vivid cues.
  • Note some boxes may not fasten to studs but freely float. Check on either side of the unit to identify a stud.
  • To peer inside and know the side where a stud lies, pull out the cover and switch off the breaker.
  • If you uncover the stud, you can use a tape to measure 16” to hone in the most adjacent. Some houses have a framing spacing of 24” or unique distances making the method unsuitable in some cases. Try other tricks to hit the mark.

5. Acoustic Thumping-Playing It By Ear

  • You can knock across the wall with your knuckle gently to detect sound differences accurately.
  • When you tap on wall seams with no stud, you will hear a resonance generated by the hollow space beneath.
  • If your knuckle hits the mark containing a stud, the sound changes to a dull thunk pitch. Move across the wall and check for a pattern to manifest itself to sense the stud spacing. Skip the area where you detect a hollow and vibrating sound, studs generate a duller, less silent and feel solid.
  • It’s a tried and tested trick but not full-proof or a litmus test as you can go close but no cigar.

7. Use A Magnet

  1. A magnet will hit the spot and detect the presence of studs in a straightforward way. Tool up with the most attractive magnet and attach a portion of dental floss or strand around it.
  2. Suspend the magnet along the wall and move it along in a snail’s pace horizontally.
  3. Occasionally, the magnet will attach to the wall for some time on a stud’s location. A strong magnet will cut it but not those floppy pizza versions.
  4. You go over with a bang as the wood lath fastens on studs, the magnet inches closer to those nails.

8. How to Mount Heavy Items Onto Plaster Walls Without Studs

Mark the regions of all of the bracket mounting spaces onto the wall; use a level to straighten the brackets.

Carve out a tiny pilot crevice using a wood-boring bit into each highlight made via the mounting crevices for every bracket. The pilot hole deters the plaster from fracturing and makes drilling other openings easier.

Drill a bigger hole to the diameter marked on the package tag for the dimension of the toggle bolt.

Insert the toggle bolt via every mounting opening in the shelf bracket and thread its wings against the bolts roughly 1/4”. Fold up the wings evenly onto the bolts and dip the edges into openings in the wall, pressing in the bolts until the wings clean-sweep the lining and snap open. Pull the tip of the bolt backwards for a firmer grip and using a screwdriver or drill to fasten the bolt.

Tips and Tricks for Stud-Finding in Plaster Walls

  • Plaster walls have nailing strips of slim wood lath, spaced ¼” apart, horizontally along the vertical studs
  • Only the sturdier, thicker wood studs beneath the considerably light, thin plaster layer can endure weighed down plasma TV, electronics and shelves
  • Timber studs lie vertically with a spacing of 450mm or 600mm away. You can search for plasterboard fixed and screwed onto the timber studs
  • If you want to use two mounting holes and can’t find another stud, substitute it with a plasterboard anchor at the reinforcing point for firm and steady support
  • Insert a needle or pin and gently whack it into the wall roughly 10mm using a hammer, if you hit a hard surface, you’ve found a target

Final Verdict

Most do-it-yourselfers have raveled out full-proof ways on How to Find Studs in Plaster Wall. Unsheathed shelving or fixtures cleverly revolutionize the functional and aesthetic flair of your plasterboard house. To mount items securely, you should fix directly into the studs in the plasterboard wall.

Most stud-finders in the market will not hit the broad side of a barn, while scanning lath and plaster. Only a multi-scanner with a metal-detecting scanning mode will work.

You can hit the mark with old tricks such as gently tapping to detect a change in pitch, locating electrical outlets, or threading through a hanger. Plaster walls have a building technique that makes it almost insuperable to drill across and cracks easily. You have to narrow down studs for heavy shelving or mounting.

Information

How To Find Studs In DrywallDrywall or lath for plaster walls hinge on studs or boards for framing support. Studs have a 16’’ to 24’’ spacing measured from midpoint to midpoint along a wall and stretch between the floor and ceiling. Hanging a cabinet, shelf and portraits with fasteners nailed directly into wall studs keeps them sturdily attached.

Drywall edges fasten over studs which create shadows of a tape joint, nail or screws. Use a glowing beam of light to illuminate the surface at a flat angle, outline of drywall joints and fasteners nestled at a stud. You can also resort to the old bag of handyman tricks like tapping with a hammer to hone in the edge of a stud.

Things To Consider About How To Find Studs In Drywall:

1. Detect One & Use A Tape Measure

If you pinpoint a stud, measure to the edge in 16’’ increments to home in the edge and center of neighboring studs.

The measurement of 16’’ from the midpoint and spacing will vary due to windows and doors. Carpenter tape measures come with 16’’ increments marked in red for more convenience.

The technique gets you to the estimated region hosting the adjacent stud; you need pinpoint-precision before whacking nails or drilling.

Use a small finishing nail drilled just above the baseboard molding via the drywall into the stud. Where the nail eats into the wood, you have verified the stud’s location.

2. Switches, Outlets, Windows & Doors

Windows and door spaces will always possess studs along the edges. Most have dual doubled-up studs known as sister or king stud to make the spaces ultra-sturdy.

You can always locate a stud above or below windows or doors.

Probe electrical switches and outlets as they mount on the edge of studs. Once you pull out the cover, you will see the side of the unit where the stud lies for supporting screws.

Measure a minimum of ¾’’ away from the unit to pin down the midpoint of the stud. You can resort to the knock and pin test to find out the stud’s breadth. Studs lie at 16’’ intervals on any side of the outlet or switch.

3. Instincts and Detective Trails

  • Scour the interior trim like baseboard and crown molding fastened onto studs. You can hit the mark if you trace tiny dimples in the trim. The nail crevices stashed with caulk or painted over after the attachment of the trim remain vivid if you examine closely.
  • Tap or knock the wall gently with a hammer to listen where a stud exists. A stud-less region will produce a low, hollow noise. A site hosting a stud will generate a higher, more robust sound.
  • Drive a thin finish nail or smaller drill bit into the wall; you may even pinpoint the wooden fragments on the drill bit once you hit the stud.

4. Drywall Stud Navigation Easier than Other Materials

  • Drywall offers the easiest of the typical wall finishes you can cut into and steer clear of studs, joists, and fire blocks.
  • Drywall has a thinner and more resonant seam, which makes stud finding easy duck soup.
  • Drywall exposes slight nail depressions; they become visible with a flashlight.
  • Cracks, nail pops, and layers become visible on walls or ceilings finished with drywall due to the natural expansion or contraction of framing studs.
  • You can easily knock screws of 1 ¼’’ or less to access the stud beneath the drywall. You can also home in onto studs with ½’’ drill to hit the wood.

5. Affordable Magnetic Stud Finders Will Do the Job

  • With drywalls, you can scan across the surface to attract a buried screw or nail. They don’t locate the stud but the metal fasteners that secure the wallboard to the framing beams.
  • You can detect the region of metallic nails and screw heads used to fix the drywall to the studs.
  • Most magnetic stud finders have a notched, cone and v-shaped base for convenient and accurate marking after you locate one stud.
  • If you have drywall with fasteners not deeply ensconced in the wall, a magnetic and low-cost stud sensor will locate the target at the drop of a hat.

6. Pinpoint-Accurate Electronic Stud Finders

  1. Electronic sensors help you pinpoint the wall studs and other targets in and around the layers. You can hone in the edge, center and hosting site as well as multiple targets simultaneously.
  2. Multiple sensor plates determine the pinpoint location, thickness and the center. Instant stud detectors also show studs-free regions in case you want to steer clear of a support beam.
  3. You can nail down the location of a metal fastener as well as wood studs, window and door framing.
  4. Electronic stud sensors have an improved accuracy range and detect studs embedded in drywall deeply. They also expose live wire up to or beyond 2”. You can also scan for wood, metal or live wires.

7. Why Find Studs in Drywall for Renovation?

  • To nail bulky and heavy objects that require support for their weight directly into a fastener
  • Attaching heavy items directly to drywall’s fibrous seams leaves surface exposed to the strain causing them to fall off
  • Pinpointing studs offers a secure and sturdier hinging point to nail or screw directly
  • Failing to accurately nail down a stud will jeopardize your precious items and leave you knocking through or bulldozing walls ruining structures
  • Homes with standard model drywall specifications allow you to home in onto studs with a tape measure, flashlight, magnetic stud sensor and nail
  • Multi-scanner and advanced stud-finding devices piece the wall for live AC wiring, rebar, ferrous and non-ferrous metals and other components you need to avoid

8. Stud-Foraging Tips & Cues

Most homes feature a 16” on-center stud, which means an adjacent one lies at the next 16” increment.

However, some external basement walls design includes 2×2’s as they can securely shore up the drywall

To use a stud finder, use a tape measure to highlight a minimum of three studs in an array, and then compute the distances between the targets. If the studs have equidistant measurements, it gives you an acid test

You can rely on a single stud to mount a sizable TV and other bulky object using two extra-large bolts in the midpoint of the snap reinforcements into the drywall render steady and sturdy support

Final Verdict

Our in-depth how to find studs in drywall guide will feed into your quest for information on safe and secure anchorage points. You won’t bark the wrong tree or search for the needle in the haystack armed with these detective cues and tricks.

If you own a stud finder, it’s a breeze to nail down fasteners for mounting heavy and permanent structures like TVs, wall shelves and cabinets. Advanced electronic stud finders can pinpoint other objects like water pipes, live AC electrical wiring, rebar and other targets.

They also boast digital LCD screens, LEDs and audio beeps to indicate a stud clearly with supportive data. Drywall layers create a red herring in your probe making high-precision, hand-held and multi-scanner tools essential.

Information

How To Find A Stud Without A Stud FinderYou don’t always need a stud finder to beat the band as a few tricks of the trade will suffice in some scenarios. Contractors trudge through the search for studs when mounting a picture, TV set or shelf with tool-free techniques.

Save time by downing the all vine-and-no taters stud finders due to inconsistencies, inaccuracies and other limitations to wing it tool-free. Old-fashioned methods may sound obsolete in a tech-paced world but mere observations, illumination, hammer-tapping, and coat hangers will cut the mustard.

For connoisseur do-it-it-yourselfers, certain markers make it easy duck soup to pin down a stud.  Nuts and bolts on the design of homes will show whether you have 2×4 or 2×6 studs, give hints near the edges of windows and doors.

Things To Consider about How To Find A Stud Without A Stud Finder:

1. Finding the Studs in Drywall

At the highlighted suspension rail line, knock the wall from the corner out to examine for the first stud.

Mark its location with a pencil to parlay it into a stud-finding cue for the next stud.

While sequential studs lie at 16” intervals, others have a spacing of 12’’ or 24’’ in some houses.

Highlight the location of every stud along the line. It shows you the point of suspension rail to the surface.

The actual sizes of a 2×4 lumber vary depending on the age of the house, more modern buildings measure 1-1/2” to 3-1/2”.

2. Acoustic Cues & Hints  

Knock gently on the surface to detect high sounds that infer a stud and a hollow noise for a stud-less portion. You will need sharp ears to capture the sound and nail down studs this way.

You can’t glimpse at studs or ceiling joists, but sound gives you a key to the mystery. Rapping has a solid thunk while space sandwiching framing components produces a hollow sound.

Well-versed stud-hunters skilled in the art to go all ears, as keen as mustard can locate a stud and drive a small nail to verify the target. If no stud or ceiling joist lies, you’ll need to patch the crevice.

3. Electrical Connections As A Starting Point

Electrical units hosting light switches or outlets attach directly to a stud. It also applies to electrical components, cable jacks and light sconces fixed during construction.

You can pull out the case and try to peek inside to see the stud or insert a thin tool on either side. You’ll see the side of the unit fastened to a stud at a glance.

Either side of the outlet or light switch mounts on a stud, tap the sides and use this as a starting point for 16’’ increments. You can assume the midpoint of a stud measures ¾’’ from the edge of an electrical outlet.

4. Unravel A Stud & Unsnarl Others at 16”

  1. If you find studs typically 16’’ on midpoint, you can also work out dimensions from the corner of the room. The other possible distance interlinking studs punches in at 24’’.
  2. Examine 16’’ from the first stud you pinpoint to estimate the location of the adjacent one. You can also tap on the wall lightly with your knuckles or hammer to detect a solid sound rather than a hollow noise.
  3. Look for outlets on the wall, detach the cover plate and illuminate the interior, you may see a stud on the side of the box. Measure the spacing from the edge to the stud, readings should reveal a 16’’ or 24’’ pattern regularly in a continuum.

5. Pore Over the Trim

A baseboard hinged on the studs give cues if you can identify the point at which it’s nailed. The dimples or crevices painted over time and fed with caulk allow you to pinpoint the stud by measuring 16’’.

  1. Most homes with baseboard, shoe moldings and crown moldings nailed to studs allow you to identify the telltale dimple with a piece of trim nailed. You can find a stud this way and measure at 16” intervals to hone in others.
  2. You’ll mark the bull’s eye and hit the mark by measuring the corner of the exterior of the building.

6. Using A Flashlight

Shine a beam of light at a slanted angle against the wall. Scour for a seam of bumps and dimples in the surface. They include indentations triggered by nails fastening the lining of the wall to the studs; it gives you a guarantee of their presence behind the veil.

If the wall uses drywall, you can ravel out studs with a flashlight. Small dimples emerge where nails thread through the drywall to the fastener.

You may also spot joists between two portions of drywall. You can nail down a stud beneath the wall where they intersect. You will need the eagle’s sharp sight and patience to pore over.

7. Play it with a Magnet

Using a strong magnet can work for various walls depending on the thickness of the seam. Thicker boards may need stronger attracters rather than a fridge field magnet to punch forces through a wall.

  1. Ensconce in a small magnet to the edge of a part of dental floss. Dental floss’ thinness won’t pose much resistance. You can also wrap a sizable refrigerator magnet in blue painter’s tape and leave a flap to use as a grip as you drag it long the surface.
  2. Oscillate the magnet along the wall until it holds on to a screw and nail beneath the plasterboard. Try to graze it zigzag on drywall; you’ll latch on screws used to secure it on the studs.

8. Benefits of Going Tool-Less in Stud-Finding

  1. No false positives or obstacles when the sensor cannot punch through the wall’s seams deeply to narrow down the framing beneath the surface.
  2. Detective cues help you zero in studs without paying for the service or equipment. It saves cash for contractors on construction sites.
  3. DIY stud navigation tricks allow you to locate sly wall studs for home renovation and other projects.
  4. Manual stud-hunting has some trial and error; you rely on your instincts to trace targets with precision.
  5. You can wing it by tooling up with a refrigerator magnet, nail, hammer, hanger, and flashlight to experiment different techniques.

Final Verdict

Mastering how to find a stud without a stud finder may sound like cussing a blue streak but it comes as a blessing in disguise. Handyman insider’s tips will go like clockwork for fast-learning DIYers to locate studs without automatic navigational tools.

With keen ears, magnifying eyes and at-the-ready accessories like a refrigerator magnet, you can virtually eliminate the false positives and home in onto a target with scalpel-like precision.

Experiment with a hanger, driving nails to bite into wooden beams, or other conventional methods to find a stud. It saves hundreds of bucks while letting you ravel out a stud for steady and firm support of pictures, TVs, shelves or other heavy objects mounted on the wall.

Information

Best Stud Finder On The Market

Beefing up your hardware kit with an up-and-running stud finder makes the task of locating a framing scantling in the wall a piece of cake. The best stud finder on the market will hone in the center or edge of a stud, pipes, joists, and live AC wiring.

Studs offer a sturdy, supportive structure for framing drywall or mounting pictures, TVs and other items. A wall supportive structure nailed directly to a stud guarantee a secure reinforcement of the things or objects mounted. Stud finders take your toolbox a notch up higher.

Stud sensors at the top of the heap stay ahead of the curve with high-precision scanning, battery lifespan, dual-tool with leveling laser, bright LCD and audiovisual alerts.

Things To Consider about Best Stud Finder On The Market

1. Neodymium-Driven Magnetic Stud Finder

Top-class magnetic stud finders offer an ultra-efficient and intuitive hands-on tool to detect nails or screws fixing the drywall to studs. Benefits include durability, budget-friendliness, and functionality.

Dual neodymium magnets can probe a sprawling area to save time and efforts. Neodymium magnetism forces help you pinpoint the metallic framing stud beneath thicker, dense plasterboards or lath.

Notched and multi-functional design models help you nail down studs’ position by highlighting.

Moving neodymium can detect screws or nails through all manner of surfaces. It runs at a pace relative to the depth of the stud making it ideal for drywall and plaster walls.

Do not require calibration, batteries, LED or electromechanical making them hassle-free but down-to-earth. Some versions detect a framing stud like whacking of two magnets.

2. Scanning Capabilities of Electronic Stud Sensors

Top-notch electronic models rapidly and seamlessly hone in the edges of metal or wooden studs and joists buried beneath walls, ceilings or floors.

Multi-scanner electronic stud finders can detect a variety of embedded materials including plastic, wood, metal, studs, conduit, unsheathed AC electrical wiring, and joists located beneath walls, floors, and ceilings.

They can scan through multiple wall surface seams from drywall, ceramic tile, concrete, plywood, and plaster.

Internal capacitive plates alter the electromagnetic parts of the wall and change in density to hit a stud. You can narrow down the edge of a framing stud, center and instant location of different parts of the target.

3. Pinpoint-Accuracy

Electronic multi-function stud sensors can detect timber or metal studs, as well as AC, live electrical wiring with scalpel-like precision.

  • Wire-warning sensors will indicate the existence of live, unsheathed electrical wiring at a predetermined depth such as 2”.
  • Stud scanning modes identify the edges of wood and metal studs up to ½” to ¾” or even deeper.
  • Deep-Scan modes pinpoint ferrous metal like rebar and non-ferrous copper pipes
  • Auto-correcting technology automatically rectifies typical user errors, like when scanning begins above a stud. Pinpointing systems mark the bull’s eye and hit the spot.
  • Stud sensors emit an electrical field to detect fluctuations as it probes a surface to find wood framing buried to ¾” and record-setting depth capacity to find rebar, pipe, steel framing and conduit in wall crevices and concrete.

4. Construction & Design

  1. The cone-shaped crevice in the device’s center allows you to insert a pencil to mark and level a stud’s edge. Others have a recessed surface shaped to host a laser level that you project along a framing.
  2. Most electronic stud finders come with an ergonomic non-slippery grip for comfortable use and control of the device.
  3. The straightforward and pinpoint electronic stud finder provides an intuitive interface and minimalist design.
  4. Subtle body design held comfortably in your hand at all angles will diminish common scanning errors.
  5. Robust construction for tough demands and ravages of the construction site offers improved durability, reliability and quality.

5. Audiovisual Alerts for Easier Navigation

  • They emit a beeping signal or LED flashlight when they detect a stud beneath the device.
  • Visual LED and audible alerts help you zero in a stud’s location, edge, and center. “Over-the-stud” alerts caution if you start scanning over a target.
  • Easy-to-spot bars on LCD screen will indicate the edge of a stud in various scanning modes.
  • LCD screens illuminated graphical indication may also include battery level
  • Nonstop beeping will alert you to a calibration error to repeat the process.
  • Intelligent backlit LCD or screen glows backlight for a clear view even in low-light ambiances, which shows detection mode, center-finding, and other readings.

6. Auto-Capability for Convenient Use

  1. Auto-calibrated stud detectors adapt to inconsistencies in wall structures for maximum reliability when scanning.
  2. Automatic calibration prevents machine errors. Pre-determined settings render automatic output.
  3. Auto-leveling technology like laser levels projects small horizontal lines so you can carve your marks accurately.
  4. Auto-power off when it becomes inactive for 60 seconds or so saves energy for a long-lasting grid.
  5. Automatic-adjusting or self-leveling systems help minimize scanning errors.

7. Ultrasound Detectors At the Frontline

Stud finders powered by ultrasound technology offers a hypersensitive system to pick any discrepancies in wall density or dialectic constant accurately.

They not only home in the stud but they also estimate its width shedding light on the exact spot to drive in the screws or nails.

The edge finder senses the fluctuations in wall density to indicate the featheredge of framing studs. Center-finding sensors have multiple detectors to prod the various variations in the electromagnetic flux. It shows you the midpoint of a stud in the wall. Instant finders with multi-sensor plates pinpoint the center and locate a variety of studs in a single stroke.

8. All Bells and Whistles

Top-end stud sensors offer additional features for the seamless operation to instantly pinpoint the stud’s location, center, and edges simultaneously.

  1. Built-in level, ruler, and other multi-functional tools make tasks such as measurement easy duck soup.
  2. Arrays of LED lights allow you to view the accurate location of the objects and dimensions beneath the surface of the walls.
  3. Unique spotlight pinpointing system and audio signals notify you when you hit a stud.
  4. Future stud locators synchronize with apps to render a better reading about targets inside the walls.
  5. Built-in erasable surface markers and subtle design for an ergonomic grip, as well as highlighting clues, improve navigation.

Final Verdict

You can cherry-pick the best stud finder on the market by considering the features and technology integrated into the devices. Smash hits can pick out and distinguish magnetic from non-magnetic materials, live AC wiring and a variety of targets.

LCD digital displays, LEDs, and audio sounds combined in these units help you hone in the center, edge or hosting region of studs with clockwork accuracy. Smart technology supports deep scanning, detection of a variety of targets such as electrical wires, pipes, studs, and rebar as well as hard-to-scan materials like ceramic tiles.

With advanced inventions including micropower impulse radar coming down the pike, more extensive ranges and multi-functional units will flood the market.

Information

How Does a Stud Finder Work

Before the advent of automatic stud navigation tools, contractors and DIY homeowners would resort to the old tricks of the trade. Though some of the techniques hit the mark, you could go close but no cigar missing the target. Today’s technologies pack endless stud-detection inventions coming down the pike.

Magnetic stud finder pioneered and spearheaded modern devices. Capacitive finders will do the job by sensing density fluctuations in a wall.

At the top of the heap, micropower impulse radar technology has a significantly greater scope than capacitive stud sensors. They can ravel out studs several inches deeper than their competitors. But locating studs depends on the system or mechanism integrated in the device.

Things To Consider about How Does a Stud Finder Work

1. Troubleshooting Tips & Tricks for using Stud Sensors

You can observe a few simple tricks to avoid wasting chunks of time with the device.

Ensure the power grid or batteries will keep the stud finder up-and-running for the task.

Timber studs or beams leave an outline near a window and door to support the substructure securely, start by scouring here.

If you suspect AC live wiring beneath the walling veil, tool up with a stud detector that traces wires to avoid electrocution or property damage

Stud-finding depends on logic, knowledge of construction plan and instincts, a little patience will uncover targets

Read and implement the manufacturer’s instructions on how to use the device

2. Electronic Finders Sample Changes in Density to Hit Studs

Electronic stud sensors home in variations in an electrostatic field or density if a target lies beneath. The lower reading suggests the existence of a stud underneath the wall. Capacitive stud detectors also boast scanning capability to locate rebar, pipes, AC voltage, and metal.

  • They detect with pinpoint precision and indicate edges, centers and locations of multiple studs simultaneously
  • They can pierce the walling veil layers beneath to 3” deep. Deep Scan mode provides an improved view of targets beneath the wall
  • Wire-warning alerts show the existence of live, unsheathed electrical wire buried deeply underneath
  • Metal Scan mode finds non-ferrous and ferrous metals for thicker plaster walls

3. Capacitive Edge Stud Finders

Capacitive edge-finders hone in the edges of a stud or other component beneath the wall. They sense a fluctuation in density when it’s directly above the edge of a stud.

The accuracy of this device will improve if you place it above an edge with the spacing between the surface and layers beneath it change quickly.

Calibrate the device above a stud-less portion of the wall, and then drag it across the surface until you detect a fluctuation in density to hit the edge of a stud.

The finder may not avoid all red herrings; it can indicate a point an inch or more from the target’s edge. Once you mark the edges of the stud, you can work out its center easily.

4. Capacitive Center Finders

Center stud finders shine through the task by pinpointing once you hit the midpoint above a surface. The device measures a wall’s dielectric constant at an equidistant to hone in the center.

  1. Center stud finders hit the bull’s eye by utilizing dual sensors that capture separate readings of a surface’s dielectric constant. If two readings correspond, the tool indicates it has latched onto the center of the stud.
  2. Move the device in either direction and recalibrate. Rugged textures can cause awkward movement along the wall inhibiting the calibration data. The varieties of readings help you determine the target’s center.

5. Capacitive Instant Stud Sensors

Instant stud detectors rely on an internal capacitor equipped with several sensory plates that immediately reports on the center, edges or multiple targets by computing an algorithm.

  1. Instant stud sensors do not require moving along the surface to nail down a target, they surpass the obstacles of crooked wall texture for a quicker, more accurate readings.
  2. The tools sense different regions of a walling in one fell swoop including the midpoint, edges and locations with no targets.
  3. Advanced multi-scanner finders feed into projected displays varying widths of targets and the site of multiple studs all at once.

6. Magnetic Stud Detectors: Stationary vs. Moving Sensors

i. Stationary Magnetic Finders

  1. Stationary magnetic stud finders have a small stationary magnet to sense the nails and screws hammered into studs while erecting the walling structure.
  2. You move it around the surface until the sensation of magnetic pull hints the direction of the pull.

ii. Moving Magnetic Finders 

  1. Moving magnetic stud sensors have a neodymium magnet suspended within a compartment but free to move in response to covered metal.
  2. For walls with superficial fasteners, the magnet leaps towards the surface with such speed that it produces a unique thud sound once it contacts the wall. Deep fasteners generate a softer sound due to the slower movement. You don’t need to feel the pull making it ideal for fasteners ensconced deep in plaster or tile.

7. Micropower Impulse Radar (MIR)

Radar detectors come with a transmitter to emit many small pulsations of radio waves angled at targets that reflect them back into a receiver reporting wood, pipes or electrical wiring. MIR uses extremely short electromagnetic vibrations to spot objects within a smaller scope. MIR sensors can hone in timber and steel studs in a wall, AC live wire, steel in concrete and plumbing lines.

  1. The sensor uncovers the location, timing and other relevant readings of the reflected radio waves to register the material found.
  2. They provide a scalpel-precise depiction of objects underneath with greater scanning range and depth several feet beneath a surface.

8. Bag of Tricks for Operating

  • For magnetic stud sensors the pull becomes stronger as you inch closer to the metal in the concrete
  • Hold the tool in your hands up and avoid body contact
  • Keep the device steady with one hand with a pencil or marking tool with the other
  • Grasp the device parallel to the lining of the walling, move it along horizontally sideways and highlight the location of edges and centers of the targets
  • You can measure out 16” or 24” increments from the point of the studs found
  • Tap the wall lightly to detect a dull, less quiet and resonant sound to verify the presence of a stud

Final Verdict

Our in-depth guide offers a mine of information for DIYers. But exactly How Does a Stud Finder Work to probe deep into the wall and detect targets?

The handheld devices identify framing studs nestled beneath the lining of a wall powered by unique technologies like internal capacitors found in electronic stud finders. To avoid investing in an all-show-and-no-go stud finder, purchase a model designed to scan multiple materials with a variety of settings.

Some newer inventions on the horizon like RF Radar integrating 3D imaging capability have made the stud-hunting task easy duck soup.

High-end instant stud finders sample multiple readings to compute the location of targets making them less prone to construction anomalies such as uneven plaster that can distort the midpoint or edge of studs.

Information

How To Find A Stud In The WallGrappling with the topic how to find a stud in the wall? Studs refer to boards or beams ensconced in walls as framing elements shoring up the framework. You need an acid test or high-precision stud finder to mark and hit the bull’s eye.

To avoid the needle in the haystack hunt or close-but-no-cigar methods, homeowners well-versed with the house plan and construction locate studs through logic, tool-free. But all other techniques pale in comparison to a stud finder as it will range in and hit the mark with pinpoint-precision.

Locating studs paves the way for decorations or home improvement. Without military precision, you risk damaging expensive components as you knock through walls, electrocution, and irreparable ruin.

Things To Consider | How To Find A stud in the wall?

1. Understanding House Structures

Every house differs in architectural design and edifice though they all share similarities. Modern stick-framed buildings erected after the 1920s or so contain 2×4 or 2×6 studs. Find below tips on the framing of walls.

The typical spacing of studs clocks in the neighborhood of 16”-to-24” on center (which indicates the distance from the midpoint of one stud to the adjacent). 16” takes the lion’s share of the dimensions.

Studs also exist on the sides of windows or doors, but their spacing depends on the floor plan and with varying spacing dimensions.

Electrical switches or outlets attach to a stud on either side.

You may also run into trim like baseboards, and crown molding nailed to studs

2. Zeroing In Studs Tool-Free

Use a battery or electric powered lamp to cast a penlight at a sharp inclination against the wall seeking bumps and dimples in the lining. Irregularities stem from nails shoring up the lining of the wall to the studs, and this makes them vivid underneath.

Scour the baseboard for outlets and nails. Nails fix baseboards to studs, and outlets bind to their edges. Electrical switches typically mount on the edges of studs at the top of walls.

Measure 16” from the studs to determine the site of the adjacent one.

Hammer a small nail into the wall where you suspect to have found the stud. Check if nailing bite into the wood beneath the plaster and drywall, extract it and slip in wire into the crevice. A quick twist of the metal cord will home in the stud allowing you to detect its location.

3. Finding Studs Using Electronic Stud Finders

Estimate the height you want to ferret out a stud. You’ll get clues from the projected height of the fastener for securely the item you want to mount.

If your device lacks auto-calibration, do it manually. Do this by holding it flat against the wall with no stud and turning it on. The stud finder signals when calibrated or if you need to reposition it and try again.

Place the stud finder against the wall moving it along the lining at the mounting distance of the fastener; edge-finders alert you on the presence of stud edges. Measure and indicate the midpoint between the sides to know the center. Center-detecting models inform you when they hit the center.

Mark several points on the target stud and pinpoint adjoining studs to confirm its presence with certainty.

4. How To Use A Magnetic STUD Finder & Pinpoint the Midpoint of A Stud

  • Magnetic-driven stud-finders work by narrowing down steel nails or screws used to shore up drywall to studs.
  • Notch-bottomed stud finders allow easy marking once you isolate studs.
  • START by placing the magnetic stud finder on the surface of the wall where you will mount or attach. Its attracted to the stud, joist or plumbing.
  • Grab a hammer and a nail; knock through to feel wood and move further to identify the center of the suspected stud.
  • Once you find the center, use a tape to measure 16 inches to the center of the adjacent stud.
  • Use a lever to mark the center of the stud where you’ll hinge on your installation.

5. Hidden Keys to Navigate & Nail Down Studs

Contractors have mastered the art of locating the studs tool-less.

  • Knock the wall vigorously and listen for a variation in the tone of the tapping, then hammering through a thin nail to ascertain the stud’s location.
  • You can also turn on an electric razor and pull the butt-end along the wall, noting the differences in tone as you reposition from its cavity to the stud.
  • Scour the wood baseboard trim for nail crevices and filled holes next to its top edge. It’s the point where nails attach the baseboard trim to studs. Baseboard nails do not penetrate into the drywall but only studs.
  • Electrical outlets have studs along the edges of the unit. The actual center lies ¾’’ from the margin of the box.

6. Construction Clues For Drywall

  • Walls also prop up drywall or interior woodwork while they envelope electrical outlets and heating supply/return pipes, you can find studs adjacently.
  • Drywall also provides the missing links as their edges fastened over studs leave shadows of a tape joint, drywall nail and screw. Use a torch or lamp to cast light across the lining at a very straightened angle. It will make vivid the outline of the drywall joint and fastener nestled at a stud.
  • Find one, measure over to the side in 16” increments to pinpoint the edge or midpoint of neighboring studs. 16” on the center but spacing varies due to windows and doors.

7. The Litmus Test To Hit the Mark

Once you sense the location of a stud’s edge, you may still want to run a reliable and conclusive test before you drive through a sizable fastener into the middle of the wall.

  • You can detect the exact location using a tiny finishing nail hammered just on top of the baseboard molding, via the drywall into the stud.
  • An incredibly small nail crevice becomes shrouded, and you can verify the location of the stud once the nail pokes into the wood.
  • Remember to cover a half-inch of the drywall before you hit the stud.
  • Also, bear in mind that 2×4 measure 2” by 4” in older buildings. The hardwood offers sturdiness, and the studs have a solid-as-rock structure.

8. Tips & Precautions for Finding A Stud

  • Houses’ frames have wall studs typically 16” or 24” apart. If you start from one corner and measure out 16” and don’t detect a stud, then one should lie at 24”.
  • Search for electrical switches or outlets. They mount on the edges of studs paving the way for a successful probe.
  • You must avoid drilling into the Live or uncovered wires beneath the wall. Most electrical wires run horizontally 2 feet above the floor or proximately next to the ceiling.
  • Cross-check local building codes and practices for installing electrical wiring for certainty.
  • Beware of false positives and negatives, mainly where wires lie behind earthed metal when using automatic navigation devices.

Final Verdict

The how to find a stud in the wall guide equips you with another fresh pair of eyes and a bag of tricks to avoid hard sledding. You can hang up a portrait on the wall or install a book shell securely by nailing it directly to studs buried in the wall due to firm and steady support.

If you hammer a bulky and heavy structure on wallboard and plaster, it will tumble with a thud when fasteners loosen.

In a technology-driven era, you won’t need sound hearing and the old contractors’ tricks as you may go close-but-no-cigar or even miss the point. Advanced stud finders will do the job by sensing density fluctuations in a wall with settings that improve precision.